


Page 5 - CC2017_AI_Look_Inside
P. 5
The Free Transform Tool in Depth Free Transform
Touch widget
The Free Transform tool allows you to Transformation handles Constraint
ILLUSTRATOR FOUNDATIONS The Touch widget, which you can use When the cursor is over a Free Distort Illustrator Foundations
change the shape of selected objects by
Free Transform
dragging the transformation handles.
Perspective Distort
to change the active transformation
mode, appears when the Free Transform
transformation handle,
tool is active. To move the Touch bar in
the icon shows which
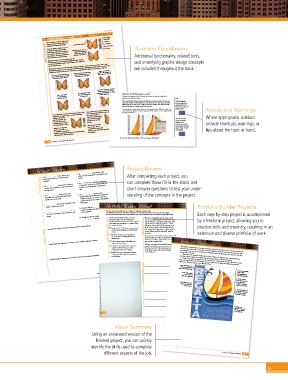
Additional functionality, related tools,
distortions can be made.
the workspace, click away from the three
buttons and drag to another location.
Moving the mouse cursor over a handle shows the
transformation that can be made by dragging that handle. Clicking
and underlying graphic design concepts
one of the transformation handles shows a larger icon to indicate the
When you first select the Free Transform tool, the widget shows that the Free Transform mode is active. Larger
possible transformation. 3. Move your cursor over the Gradient Annotator to show the associated stops.
transformation handles appear over all eight of the selected object’s bounding box handles. In this case, most of the
are included throughout the book.
available transformations are the same as those you can make when the Selection tool is active (see Page 37).
Drag a center handle
to the bounding box edge to scale
You can turn off the
edge to skew the selection.
Drag a corner handle diagonally in or Drag a center handle perpendicular parallel to the bounding box Note:
out to scale the selection horizontally
the selection in one direction.
Gradient Annotator
and vertically at the same time. in the View menu
Moving the cursor (View>Hide Gradient
near the Gradient Annotator).
Annotator reveals the
gradient stops.
Press Shift, or activate the Constraint 4. Using the Gradient tool, click the bottom-right corner of the sail, then drag
option, to transform the selection
Press Option/Alt to apply proportionally (maintaining the original up and left until the gradient width is slightly less than the shape’s actual
Click a corner handle the transformation around height-to-width aspect ratio). width (use the following image as a guide).
and drag around to the center point. Clicking and dragging with the Gradient tool defines the width and angle of the
rotate the selection. gradient within a selected object. Note:
When working with a linear gradient, the first place you click with the Gradient tool Click and drag the
defines the location for the starting color of the gradient; where you release the mouse gradient endpoint (the
button marks the location for the ending color of the gradient. Any areas beyond the smaller circle) on the
two ends fill with the end-stop colors of the gradient. annotator to change the
If you activate the Free Distort option, you can drag the As you drag, the marquee shows a preview of the gradient width. When you release the gradient width. Advice and Warnings
mouse button, the gradient annotator snaps back to the object’s center; its angle matches
If you activate the Perspective Distort option in the Touch corner transformation handles to distort the selection. When the angle you defined.
widget, you can drag the object’s corner transformation
the Constraint option is
handles to change the active, you can only drag the Place the cursor just Where appropriate, sidebars
corner exactly horizontal or
object’s perspective. (The vertical from its previous
Constraint option is not outside the gradient
available when the Perspec- position. endpoint on the provide shortcuts, warnings, or
tive Distort option is active.) When the Free Transform annotator to reveal the
mode is active, you can
rotation cursor; click and
When the Free Transform accomplish the same goal by drag to change the angle
mode is active, you can clicking a corner handle, then pressing Command/Control of the gradient. tips about the topic at hand.
accomplish the same goal by and dragging.
clicking a corner handle, then pressing Command-Option-
Shift/Control-Alt-Shift and dragging.
5. Save the file and continue to the next stage of the project.
38 Project 1: International Symbols
Project Review 6. The _______________ panel includes value Project Review Project 2: Regatta Artwork 103
1. The _______________ tool is used to place sliders for each component in the defi ned color After completing each project, you
anchor points that are connected by line
fi ll in the blank 2. The _______________ tool is used to change a 7. The _______________ is used to paint shapes can complete these fill-in-the-blank and
model.
segments.
of solid color based on the defi ned brush size
and the area you drag with a single mouse
smooth anchor point to a corner anchor point
short-answer questions to test your under-
click.
(and vice versa).
3. The _______________ tool is used to edit 8. The _______________ appears over a standing of the concepts in the project.
gradient-fi lled object when selected with the
individual anchor points (and their related
position and direction of color in the gradient-
handles) on a vector path. Gradient tool; you can use it to control the
4. _______________ is the range of possible colors fi lled object.
within a specifi c color model. 9. Changes made to a _______________ color Portfolio Builder Project Portfolio Builder Projects
5. _______________________________________ swatch are refl ected in all elements where that Each step-by-step project is accompanied
Use what you learned in this project to complete the following freeform exercise.
color is applied.
are the four component colors in process-color
Carefully read the art director and client comments, then create your own design to meet the needs of the project.
output. 10. Individual objects on a layer appear as Use the space below to sketch ideas; when fi nished, write a brief explanation of your reasoning behind your fi nal design. by a freeform project, allowing you to
_______________ in the Layers panel.
Your local animal shelter hosts an annual
We raise a considerable portion of our annual
fundraising gala on the rst Saturday in
operating budget during this annual event. is
October. You have been hired to create a poster
style of Victorian-England oppulence... ink
tie masquerade ball.
1. Describe three ways to deselect the current selection on the artboard. art director comments advertising this year’s theme — a classic, black- client comments year the theme is a very classic masquerade in the practice skills and creativity, resulting in an
“Phantom of the Opera,” the state dining room
on the Titanic, that sort of thing. Men in tuxes
o Design an 11 17 poster to promote the
and women in owing gowns, everyone masked
short answer o Develop a creative type treatment for midnight. extensive and diverse portfolio of work.
event in local storefronts and other public
in some fashion until the traditional ‘reveal’ at
venues.
Every year the event includes a silent auction with
the event name: “Barking Mad for the
some incredible prizes that are donated by local
Masquerade”
businesses, as well as a gourmet four-course meal
2. Briefl y explain the signifi cance of “process color” related to Illustrator artwork.
o Find or create imagery and graphics to
support the event theme.
If there is any way you can tastefully incorporate a
o Include the event date (look at this year’s prepared by a celebrity chef. Project Summary
couple of animal photos into the poster, we would
calendar to nd out the exact date) like that. But it isn’t really a requirement as long
prominently in the poster design. as the shelter’s name and contact information is is project incorporated more advanced drawing techniques that allow you to exercise precise control
o Include the contact information (phone clearly displayed. way to master this skill.
over every point and path in a le. e Pen tool is arguably one of the most important tools you will
number and Web address) for your local
3. Briefl y explain the advantage of using the PDF format for creating printable fi les. animal shelter. applications that can’t import native Illustrator les.
use throughout your career as an illustrator; although it can be challenging at rst, practice is the best
is project also explored working with color in Illustrator: applying color, saving global color
swatches to make changes more e ciently, and using gradients to add visual interest.
project justifi cation lines in a hand-drawn sketch Use the Shape Builder
Finally, you saved your artwork in a le format that is commonly used to share Illustrator artwork
with other applications. e PDF format is an invaluable part of design work ows using software
Use the Pen tool to create
custom artwork based on
123
Project 2: Regatta Artwork specific line segments overlapping objects
tool to divide
Use the Anchor Point
tool to reshape
into individual shapes
Use the Gradient
Annotator to control
Use the Blob Brush tool
position of gradients
to paint the outline of the content and
custom shapes within specific objects
Use global swatches to
allow universal changes
to all objects where
that color is applied
Use layers and
sublayers to manage
the various elements
in a complex file
124
Visual Summary
Using an annotated version of the
finished project, you can quickly
identify the skills used to complete
different aspects of the job. Project 2: Regatta Artwork 125
v

