
Page 5 - Adobe Illustrator 2022
P. 5
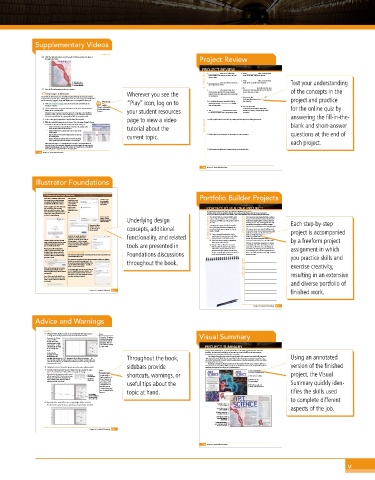
Supplementary Videos
21. Click the right selected pin and drag right until the second point aligns to
the right panel edge. Project Review
PROJECT REVIEW 6. Using _______________ rulers, measurements
fill in the blank before folding, and after it has been cut from 7. Using _______________ rulers, measurements
1. _______________ is the size of a flat page
relate to the first artboard in the file.
a press sheet.
Shift-click to select 2. _______________ is the area where it is safe to relate to the currently active artboard. Test your understanding
both bottom points,
then drag them right. place important content.
22. Save the file and continue to the next exercise. 3. _______________ is the amount you must 8. The _______________ icon indicates that more of the concepts in the
text exists in the story, but does not fit into the
Crop Images in Illustrator Wherever you see the extend objects beyond the actual artboard current text area or chain.
edge for them to safely appear at the cut edge
The outside of the brochure you are building requires breaking the Einstein painting of the final job. 9. You can use the _______________ dialog box
image into three separate pieces. Although you can’t cut a raster image apart in Illustrator, to change all instances of a selected font in project and practice
you can use image cropping, along with duplication, to accomplish the same goal. 4. For a folding document, panels that fold in the active file.
Watch the video “Play” icon, log on to
1. With aos-brochure.ai open, make the Outside artboard visible in the Cropping and need to be at least _______________ smaller
document window. Clipping than outside panels. 10. You can choose the _______________
2. Choose the Einstein image with the Selection tool, then click the Embed Images in Illustrator command to show visible, nonprinting for the online quiz by
in your online student
button in the Control panel. resources. your student resources 5. The _______________ command can be used indicators of spaces and paragraph return
Illustrator’s image-cropping functionality requires the image data to be embedded in to convert any object into a nonprinting guide. characters.
the Illustrator file. If you try to crop a linked image, you are warned that the linked
file must be embedded and the cropping will not affect the original placed file. answering the fill-in-the-
3. In the Layers panel, expand the Graphics layer (if necessary). page to view a video 1. Briefly explain how the mechanics of printing affect the layout for folding documents.
4. With the embedded image selected, choose Object>Arrange>Bring To Front.
Commands in this submenu affect the stacking order of selected objects: short answer blank and short-answer
• Bring to Front moves selected objects to the top of the stacking order, tutorial about the
above all other objects on the same layer.
• Bring Forward moves selected objects up one place in the
stacking order.
• Send Backward moves selected objects down one place in 2. Briefly explain two advantages of using styles for text formatting. questions at the end of
the stacking order. current topic.
• Send to Back moves selected objects to the bottom of the
stacking order, below all other objects on the same layer.
When you paste objects — as you will do in the next step — the pasted objects are each project.
placed at the top of the layer stack. Although not strictly necessary, this step moves the
original embedded image to the top of the stack on the Graphics layer, so that all three
copies will appear in sequential order in the Layers panel. 3. Briefly explain the difference between linked and embedded files.
274 Project 5: Letterfold Brochure
306 Project 5: Letterfold Brochure
Illustrator Foundations
Collaborating through Illustrator Portfolio Builder Projects
If you have an individual Creative Cloud After you have
user account, you can take advantage saved a file in your Click here to type
the email address
of a number of collaboration features cloud account, you
directly within the Illustrator interface. can reopen the of the person you
want to invite.
Share Document
At the top-right corner of the workspace, panel to invite PORTFOLIO BUILDER PROJECT
you can click the Share Document other users to
button to enable these options. If you collaborate on the
have saved the file on your local drive or file. Use what you have learned in this project to complete the following freeform exercise.
Carefully read the art director and client comments, then create your own design to meet the needs of the project.
network, you are first prompted to save
the file as a cloud document. Use the space below to sketch ideas. When finished, write a brief explanation of the reasoning behind your final design.
Use the Copy Link The Painted Turtle is a camp for children with Our camp is one of the largest of its kind, catering to
button to send an serious medical conditions. It is run entirely by the special needs of children (and their families) who
invitation through your Underlying design donations, and children are not charged to attend would not normally be able to experience the joy of
regular email app. the camp. attending summer camp. Our largely volunteer staff Each step-by-step
If you use the built-in Last spring the camp was heavily damaged by client comments gives its time and expertise to make this a positive
invitation option, you fire, so the camp directors and organizers are experience for every child who comes through the gates.
can add a message in concepts, additional art director comments launching a fundraising campaign to raise the We estimate that it costs about $1,600 per child
the pop-up panel. funds to rebuild. to attend the camp, but we never turn away a sick project is accompanied
child whose family can’t afford it. Our fundraising
mailed, placed in stand-up rack-card holders,
By default, the people you invite to functionality, and related o Create a letterfold brochure that can be efforts are vitally important to provide as many
children as possible with memories they will
collaborate are only able to make and handed out at community events. cherish. The fire last spring was devastating, and we
Clicking Continue in the pop-up panel comments on the file. You can click the o Look at the camp’s website for inspiration need more funds now than ever to help rebuild. by a freeform project
) in the top-right
Settings button (
opens a dialog box where you can assign corner of the panel to allow collaborators (www.thepaintedturtle.org). We want the fundraising pamphlet to be happy
a different name (if you choose) when
you save the file to the cloud. to save a copy of the file in addition to tools are presented in o Include a “Donate Now” section with a and colorful, and reflect the overall spirit of our
adding comments.
camp. You can find a lot of text and images on
form to gather the donor’s name, contact
Warning: If your file includes linked information, amount of donation, and our website; use anything you want from the site assignment in which
images or graphics that reside on your method of donation (check or credit card). as FPO images. Once you know which ones you
local drive, those elements will not be Using the Comments Panel Be sure to include space to gather the donor’s want to use, we’ll provide you with high-resolution
available to other users (or if you open The Comments panel (Window>Comments) provides an easy in-app interface for Foundations discussions credit card information if necessary. versions for print.
the file on a different machine through communicating about a file.
your own account). you practice skills and
The Comments panel shows all unresolved comments that have been added to
the file. You can click the Resolve icon ( ) to throughout the book.
file away that comment without deleting it. You
can also click the More button ( ) to edit or exercise creativity,
delete a comment from the file.
If you see this message, you can dismiss project justification
it and then choose whether or not to In the bottom-right corner of the panel, you can
embed any linked images directly into the use the Show/Hide Annotations button ( ) to
containing file. hide comment markers in the file, or use the resulting in an extensive
Filter button ( ) to show comments based on
Once a file is saved in the cloud, it uses user, date, and status (resolved).
the “.aic” extension; the document tab
shows a special “Cloud” icon in front of
and diverse portfolio of
the file name.
finished work.
Project 5: Letterfold Brochure 305
Project 5: Letterfold Brochure 307
Advice and Warnings
5. Using the Smart Guides to snap to the existing artboard edges, create a Note:
rectangle that exactly matches the size of the Outside artboard. Remember: The software Visual Summary
Remember, the Outside only shows two decimal
artboard width is
the sum of the three places for the artboard
individual panel widths: dimensions. This Out-
4 + 4 + 3.875 = 11.875. side artboard is actually
This should be the width 11.875 wide. PROJECT SUMMARY
of the rectangle you
create. To begin the letterfold layout, you built technically accurate folding guides for each side of the
As you drag the brochure. To speed up the process for the next time you need to build one of these common
rectangle, the cursor letterfold jobs, you saved your initial work as a template.
feedback shows the Throughout the book, Completing this project also required extensive work with imported text, specifically, importing Using an annotated
two-digit decimal places of 11.88. Remember, this is a flaw in the software — the styles from a Microsoft Word file and controlling the flow of text from one frame to another. You
same flaw that rounded the artboard width to two decimal places. However, when you also worked with several advanced text-formatting options, including paragraph and character styles,
release the mouse button, the Transform panel shows the accurate three-digit decimal and typographic fine-tuning.
measurement of 11.875. Templates and styles are designed to let you do the majority of work once, and then apply it as
extensively throughout your career as a graphic designer.
6. Using the Control or Transform panel, choose the center reference point. sidebars provide many times as necessary. Many different projects can benefit from these tools, and you will use them version of the finished
7. Break the link between the W and H fields. After the existing W value, Note: Create accurate templates for
type +.25, and then press Return/Enter to apply the change. both sides of a folding brochure
Again, mathematical operators make it easy to Turn off the Remember, if you have shortcuts, warnings, or project, the Visual
a small monitor or
add the required 0.125″ bleed to the rectangle. Constrain option. Application frame, the Check and correct spelling
Because you anchored the rectangle at the
center reference point, half of the 0.25″ is Type after the X and Y fields in the Adjust line spacing
existing value.
added to each side of the shape. Control panel might to correct widows
be condensed into a useful tips about the Summary quickly iden-
“Transform” hot-text Work with paragraph and
link that opens the character styles to format text
Transform panel where
you can define the guide tifies the skills used
positions. topic at hand.
The rectangle is
now 1/4” wider than
the artboard, with
1/8” on either side. to complete different
8. Repeat Step 7 to add 0.25″ to the rectangle height, half on each side.
You don’t need to reselect the reference point because it retains the last-used option. Apply hyphenation to
correct a widow
Format tabbed text for aspects of the job.
better readability
Use styles to format text
on multiple artboards
Create links to a variety
of external image and
graphics files
Embed Illustrator files to
access and change specific
elements in the group
Project 5: Letterfold Brochure 255
308 308 Project 5: Letterfold Brochure
v