


Page 5 - CS6_WD_Look_Inside
P. 5
The Image Properties Panel in Depth
When an image is selected in the document A B C D E F G
window, the Properties panel not only
DREAMWEAVER FOUNDATIONS image-related functions. Although Dreamweaver is not an image-editing application, Web Design Foundations
displays properties (attributes) of the image,
but also provides access to a number of
you can use it to perform some basic image-editing
A. Edit opens the image file in its native application.
functions. These tools can’t replace Adobe Photoshop, but
GIF and JPG files open in Photoshop; PNG files open in
they are well suited for making quick adjustments to an
Fireworks (assuming you have those applications).
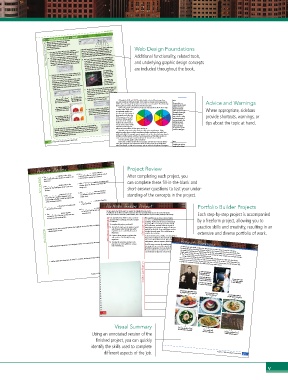
Additional functionality, related tools,
image from directly within the Dreamweaver application.
B. Edit Image Settings opens a dialog box where you
D. The Crop tool can be used to remove unwanted areas
can change a variety of options for the selected file
format. You can also use the Format menu to change the
of an image. When you click the Crop tool, the lighter
and underlying graphic design concepts
area shows the area that will be included in the cropped
format of the selected image; if you change the format,
image; you can drag any of the eight handles around
you will be asked where you want to save the new file.
the edge of the crop area to change the area. Pressing
Return/Enter finalizes the crop; pressing ESC cancels the
crop and restores the original image. Drag any of the are included throughout the book.
C. Update From Original can be used to make sure an handles to change
the area that will
inserted Photoshop image in the HTML file is the most
be included in the
recently saved version of the image. cropped version.
If you insert a native Photoshop (PSD) file into a page,
The lighter area
Dreamweaver converts it to a file that is appropriate shows what will
remain after the crop
for Web browsers. The original link to the PSD file is
maintained; if the PSD file is changed, Dreamweaver
has been applied.
notifies you that the image must be updated to the most
image to exactly match the size of the selected instance
recent version. E. The Resample tool changes the number of pixels in an
in the page. This has the same effect as clicking the
Commit Image Size button after resizing an image in the
Design pane.
The actual image in the F. Brightness and Contrast can be used to change
When you place a native page is converted to a those properties in a selected image.
Photoshop file, Dreamweaver Web-friendly format. Although the RGB and CMYK models handle color in different ways, these Note:
stores a link to the original file. two color models are definitely linked. RGB colors are directly inverse (opposite) to Advice and Warnings
CMY colors, referring to the position of each color on a color wheel. The relationship Because white is a
between primary colors is the basis for all color correction. combination of all colors
This indicator shows that of light, white paper
the image in the HTML file G. The Sharpen option can be useful for restoring some Referencing a basic color wheel can help you understand how RGB colors relate should theoretically
is the most recent version. detail after resizing/resampling (especially upsizing). to CMY colors. If you center reflect equal percentages Where appropriate, sidebars
Keep in mind, however, that oversharpening can often
an equilateral triangle over
of all light wavelengths.
the triangle touch either the
The red indicator arrow tells produce worse results than what you start with. the color wheel, the points of However, different provide shortcuts, warnings, or
papers absorb or reflect
you the Photoshop file has RGB primaries or the CMY varying percentages of
been modified since you
placed it into the HTML file. primaries. Adding together some wavelengths, thus
two points of the triangle
results in the color between defining the paper’s tips about the topic at hand.
the two points. Red and blue apparent color. The
Remember: All of the Dreamweaver image-editing tools permanently modify the combine to form magenta, paper’s color affects
edited file. If you use any of the image-editing buttons, you see a warning that the
the appearance of inks
yellow and cyan combine to form green, and so on.
changes permanently affect the file (unless someone has checked the Don’t Show ...
printed on that paper.
Opposite colors on the color wheel are called color complements. Using
option in the dialog box). Always keep a backup image so if you over-edit, you can
replace the backup image and start over. subtractive color theory, a color’s complement absorbs or subtracts that color from
visible white light. For example, cyan is opposite red on the color wheel; cyan absorbs
red light and reflects green and blue. If you know green and blue light combine to
create cyan, you can begin to understand how the two theories are related.
400 Project 8: Photographer's Web Site How does all this apply to color correction? Note:
If you want to add a specific color to an image, you have three options: add the
color, add equal parts of its constituent colors, or remove some of its complement It might seem easiest to
color. For example, to add red to an image, you can add red, add yellow and magenta, simply add or subtract
or remove cyan. Conversely, this means that to remove a color from an image, you can the color in question, but
remove the color itself, remove equal parts of its constituents, or add its complement. a better result might be
To remove cyan from an image, for example, you can remove cyan, remove blue and achieved by adding one
green, or add red. color and subtracting
Make sure you understand the relationships between complementary colors: another. For example, if
• To add red, add yellow and magenta or remove cyan. an image needs less blue,
• To add blue, add cyan and magenta or remove yellow. simply removing cyan
can cause reds to appear
• To add green, add cyan and yellow or remove magenta. pink or cyan to appear
green. Adding magenta
• To remove cyan, remove blue and green or add red. and yellow to balance the
Project Review
Project Review • To remove yellow, remove green and red or add blue. existing cyan creates a
better result than simply
• To remove magenta, remove blue and red or add green.
removing cyan.
transparency but not a large gamut of color; it
After completing each project, you
1. The _______________ attribute of the <img> 6. The _______________ format supports Understanding Gray Balance
is best used for graphics and artwork.
tag is required to make images accessible for all
Understanding the concept of neutral gray is also fundamental to effective color
fi ll in the blank 2. The _______________ attribute defi nes the 7. A(n) _______________ replaces one image with remaining problems can be at least partially (if not entirely) corrected by correcting Note:
correction. Once you correct the contrast (tonal range) of an image, many of the
can complete these fill-in-the-blank and
Web users.
the gray balance, or the component elements of neutral grays within an image.
another when the mouse cursor enters the
An important point to
In the RGB color model, equal parts of red, green, and blue light combine to
specifi c fi le that will appear in the <img> tag
remember is that any
image area.
short-answer questions to test your under-
create a shade of gray that is equal to the percentage of each component — R=0 G=0
color correction requires
B=0 creates pure black, while R=255 G=255 B=255 creates pure white. To correct an
compromise. If you add
location.
an animation fi le that was exported from
standing of the concepts in the project.
equal percentages of the three primary colors.
correct a certain area,
3. The _______________ property of CSS can 8. The _______________ extension identifi es image in RGB mode, you should evaluate and correct the neutral grays so they contain or remove a color to
Using the CMYK color model, equal percentages of cyan, magenta, and yellow
you also affect other areas
be used to tile a single background image
Adobe Flash.
theoretically combine to produce an equal shade of gray — C=0 M=0 Y=0 creates
horizontally, vertically, or both throughout the
of the image.
pure white, while C=100 M=100 Y=100 theoretically creates pure black. In practice,
entire document window. 9. The _______________ extension identifi es 104 Project 2: Menu Image Correction
4. _______________ is the process of cutting out/ a Flash video fi le. Portfolio Builder Projects
off portions of an image. 10. A _______________ is a graphic that appears Portfolio Builder Project
to the left of the site URL in the browser’s
5. The _______________ format supports navigation bar. Use what you learned in this project to complete the following freeform exercise. Each step-by-step project is accompanied
Carefully read the art director and client comments, then create your own design to meet the needs of the project.
continuous-tone color but not transparency;
Use the space below to sketch ideas; when fi nished, write a brief explanation of your reasoning behind your fi nal design.
it is best used for photographs. Our agency has been hired to create a series of We would like you to create a series of videos by a freeform project, allowing you to
art director comments
animated videos explaining scienti c principles
over the next year (as the grant funds become
for children.
available). e rst one we want is an illustration
1. Briefl y describe three image fi le formats that might be used on the Web, including advantages and To complete this project, you should: client comments of gravity. We’re not entirely sure how it should practice skills and creativity, resulting in an
look or function. We kind of like the legend of
Research the topics you are going to model
Isaac Newton sitting under an apple tree, when an
apple fell on his head. If you could gure out how
and determine what (if any) data will be
short answer Create or locate images or graphics that consider other solutions. extensive and diverse portfolio of work.
required to create a scienti cally accurate
disadvantages of each.
to make that work, great. If not, we’re happy to
illustration.
As more funds become available, we’re also going to
will result in a “kid-friendly” learning
want movies to illustrate other scienti c principles.
experience.
Our current list includes tectonic plate movement,
2. Briefl y explain the importance of resampling, relative to resizing images in Dreamweaver. Develop the animations so they can be tidal patterns, volcanic eruptions, and friction. Project Summary
placed into an existing Web site, using a
It will be easier to secure the secondary grants for
600 800 le size.
later projects if we can include a speci c plan for
the di erent programs. Once you nish the gravity As with many other skills, it takes time and practice to master image correction techniques.
illustration (which we already have the money for), Understanding the relationship between brightness and contrast, and how these two values a ect
can you sketch out plans for at least two others? (a “ at” image) translates to an unsatisfactory print.
the quality of reproduction in digital images, is the rst and possibly most critical factor in creating
3. Briefl y explain the advantages to using CSS to defi ne background colors and images. of accurate color correction. E ective color correction relies on the numbers, rather than what you
a high-quality image. An image that has too much contrast (a “sharp” image) or not enough contrast
A basic understanding of color theory (speci cally complementary color) is the foundation
project justifi cation Remove photographic
think you see on your monitor. As you gain experience in correcting images, you will be better able
to predict the corrections required to achieve the best possible output.
425
Project 8: Photographer's Web Site sharpen techniques
grain with blur and
Use the Healing Brush
Correct contrast and
and Spot Healing Brush
tools to correct scratches
Levels adjustment
Use the Clone Stamp tool tonal range using the
to remove major damage
Correct minor color problems using
the Brightness/Contrast adjustment
Correct gray balance using
the Curves adjustment with the Exposure adjustment
Correct lighting problems
226
Visual Summary
Correct overall color cast using
the Color Balance adjustment Correct contrast with
Using an annotated version of the the Curves adjustment Use Merge to HDR Pro to find
detail in multiple exposures
finished project, you can quickly
identify the skills used to complete
different aspects of the job. Project 2: Menu Image Correction 121
v

