


Page 4 - CS6_WD_Look_Inside
P. 4
Walk-Through
4
4
4
4
project
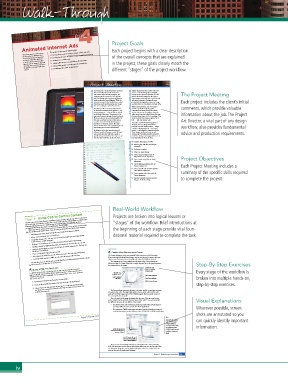
Animated Internet Ads Project Goals
Each project begins with a clear description
Creating shape tweens to animate changes in shape and color
Your client wants to create a series is project incorporates the following skills:
of ads to place on Web sites that Creating classic tweens to animate changes in position and opacity of the overall concepts that are explained
are used by existing and potential
customers. ey have asked you Adding text to a Flash movie
to create a short animation rather Adapting le content to match di erent le dimensions in the project; these goals closely match the
than just a static image, in hopes of Using a Flash project to manage assets for multiple les
attracting more attention when the
ad appears in a browser with other Publishing a le to SWF for distribution
content. different “stages” of the project workfl ow.
Project Meeting Digital images come from a wide variety of
e Chateau is a unique destination restaurant
client comments that consistently wins awards from local art director comments sources: scanned photographs and digital The Project Meeting
cameras are the two most common, as is the
and national food and wine reviewers. e
restaurant was rst opened in 1952 by Paul
case for the client’s images for this project.
and Gina Roseman as a rest stop and diner for
Some images can be used as is, or at least with
travelers along the Sierra Highway. While the
Each project includes the client’s initial
only minor correction. Realistically, most
restaurant remains in the family, it has evolved
professional photographers reshoot an image
from home-style comfort food to more exotic
fare such as wild game with a French twist.
Unfortunately, however, not every project
involves a professional photographer.
e history of the restaurant is important to until they have one that doesn’t need your help. comments, which provide valuable
us. We have a Roseman family portrait — my Consumer-level cameras have come down
great-grandparents — that we’d like to include in price and gone up in quality to the point
on the back of the menu. e picture is a bit where many non-professionals shoot their own information about the job. The Project
grainy and has some damage, though, and we’d photos without proper skill or knowledge. at
like you to clean it up as much as possible. We means many of those images require a bit of
also want to include a picture of the current help — and some require a lot. Art Director, a vital part of any design
executive chef, who is Paul and Gina’s great- Even when a professional photographer is
grandniece, in the same section. e only involved, not every image comes from a
picture we have of her is very dark though, and perfectly lit studio. Location shots — where workfl ow, also provides fundamental
we’re hoping you can make it look better.
a subject is photographed in a “real-world”
In addition, we’ve taken several pictures of setting — can’t always be captured perfectly.
di erent meals that Suzanne created. We want ose images usually need work as well. advice and production requirements.
you to make sure they will look as good as Fortunately, Photoshop provides a powerful
possible when printed. You’re the expert, so we toolset for solving most image problems, or at
trust that you know what needs to be done. least improving the worst of them.
project objectives Remove grain with blur and sharpen
To complete this project, you will:
techniques
Heal severe scratches
Clone out major damage
Correct minor problems with the
Brightness/Contrast adjustment
Correct tonal range with the Levels
adjustment Project Objectives
Correct lighting problems with the
Exposure adjustment Each Project Meeting includes a
Correct overall color problems with the
Color Balance adjustment summary of the specifi c skills required
Correct precise color values with the
Curves adjustment
Combine multiple exposures with the to complete the project.
Merge to HDR Pro utility
Real-World Workfl ow
Stage 3 Using CSS to Control Content Projects are broken into logical lessons or
The first stage of this project focused on building a layout structure with div tags and ID selectors; in
the second stage, you created a template file to more easily apply the defined layout to multiple pages.
“stages” of the workfl ow. Brief introductions at
Although defining structure is a significant part of designing pages, it is only half the story —
professional Web design also requires controlling the content in pages.
When you create a complex project such as a complete Web site, it’s a good idea to have a solid
plan for completing all required work. Consider what you know from the initial project analysis: the beginning of each stage provide vital foun-
• The background image should extend the entire height of the browser window.
• All text in the site should use a sans-serif font. dational material required to complete the task.
• Paragraphs of copy in the main text need to be small and dark gray, with large spacing
between lines in a single paragraph.
• Heading 1 in the main text area needs to be large, bold, and colored dark orange.
• Heading 2 should be slightly smaller, italic, and should use the same color as main text.
• Text links should appear in orange text in all but the sidebar navigation list. The link text
should not be underlined.
• Footer text should be light gray and centered. The Curves adjustment is the most powerful color-correction tool in Photoshop.
• The sidebar links should be centered, and use the same color as the page background.
CorreCt Gray BalanCe with Curves
• Text links should switch to a different color when the mouse rolls over them.
If you understand the ideas behind curves, you can use this tool to remove color cast,
The first three items on this list were accomplished when you defined properties for the <body>
The diagram in the Curves dialog box is the heart of the Curves adjustment.
tag. You now need to complete the remaining items. enhance overall contrast, and even modify color values in individual channels. Step-By-Step Exercises
When you open the Curves dialog box, a straight diagonal line in the graph represents
the existing color in the image.
Define HTML Tag SeLecTorS
In addition to the <body> tag that encloses the page content, properly structured modify the curve Review the entire Every stage of the workfl ow is
image or individual
pages use HTML tags to identify different types of content. CSS uses tag selectors to
channel curves
format HTML tags such as paragraphs (<p>), headings (<h1>, <h2>, etc.), unordered
Edit points to
lists ( <ul>), and so on. Draw to modify Black Point eyedropper broken into multiple hands-on,
1. Open index.html from the Yosemite site root folder. White Point eyedropper
Gray Point eyedropper
the curve
2. Click the New CSS Rule button at the bottom of the CSS Styles panel.
3. Choose Tag in the Selector Type menu, type h1 in the Selector Name field, step-by-step exercises.
and make sure master.css is selected in the Rule Definition menu. Click OK
The horizontal axis represents the input color value, and the vertical axis represents
to define the new rule. the output color value. The upper-right point is the maximum value for that color
mode (255 for RGB images and 100 for CMYK images). The bottom-left corner of
the curves grid is the zero point.
The color mode of the image determines the direction of the input and output
scales. In both CMYK and RGB, 0 means “none of that color.” However, remember Visual Explanations
the difference between the two different color modes:
• The additive RGB color model starts at black and adds values of each channel
to produce different colors, so 0, 0, 0 in RGB equals black. Wherever possible, screen
• The subtractive CMYK model starts with white (paper) and adds percentages of
each ink (channel) to produce different colors, so 0, 0, 0, 0 in CMYK equals white. shots are annotated so you
Project 9: Yosemite CSS Layout 469 Note:
Remember, the additive can quickly identify important
colors (RGB) at full
strength combine to
create pure white, while information.
the subtractive colors
In RGB, the zero point (CMYK) at full strength
represents the black point combine to create pure
or image shadows.
black.
In CMYK images, the zero
point represents the white
point or image highlights.
Every curve is automatically anchored by a black point and a white point. (For
RGB, the black point is at the bottom left and the white point is at the top right.) You
can add points along the curve by simply clicking the curve. You can also move any
point on the curve by clicking and dragging.
Project 2: Menu Image Correction 107
iv

