


Page 65 - CC 2019 WD Look Inside
P. 65
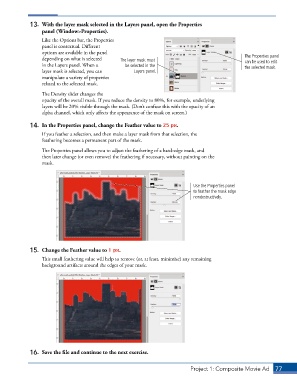
13.  With the layer mask selected in the Layers panel, open the Properties
                 panel (Window>Properties).
                 Like the Options bar, the Properties
                 panel is contextual. Different
                 options are available in the panel
                 depending on what is selected   The layer mask must                           The Properties panel
                                                                                               can be used to edit
                 in the Layers panel. When a     be selected in the                            the selected mask.
                 layer mask is selected, you can     Layers panel.
                 manipulate a variety of properties
                 related to the selected mask.

                 The Density slider changes the
                 opacity of the overall mask. If you reduce the density to 80%, for example, underlying
                 layers will be 20% visible through the mask. (Don’t confuse this with the opacity of an
                 alpha channel, which only affects the appearance of the mask on screen.)

             14.  In the Properties panel, change the Feather value to 25 px.

                 If you feather a selection, and then make a layer mask from that selection, the
                 feathering becomes a permanent part of the mask.
                 The Properties panel allows you to adjust the feathering of a hard-edge mask, and
                 then later change (or even remove) the feathering if necessary, without painting on the
                 mask.


                                                                            Use the Properties panel
                                                                            to feather the mask edge
                                                                            nondestructively.


             15.  Change the Feather value to 1 px.

                 This small feathering value will help to remove (or, at least, minimize) any remaining
                 background artifacts around the edges of your mask.


             16.  Save the file and continue to the next exercise.


                                                                          Project 1: Composite Movie Ad    77

