


Page 5 - CS6_GD_Look_Inside.pdf
P. 5
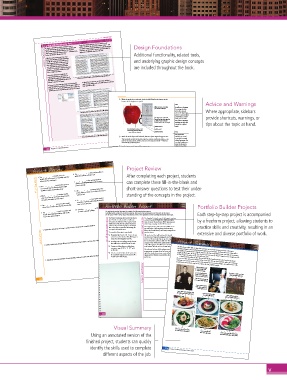
Designing with Placeholder Text Rather than waiting until the client’s content is ready — Design Foundations
which is sometimes the day before a project is due — you
It’s always a good idea to begin a project as soon as
can design a layout using placeholders to mark the location
possible after getting the assignment. When working with
of pictures and text frames, and even experiment with the
INDESIGN FOUNDATIONS project comes before the actual content — sometimes long appearance of different elements of the text. Additional functionality, related tools,
clients, however, you will often find that the idea for a
before the client has finalized the text.
With the insertion point placed in a text
frame, choosing Type>Fill with Placeholder
and underlying graphic design concepts
Text fills the active text frame with lorem
text (supposedly from a Latin treatise on
ethics written by Cicero more than 2000
years ago) using the default text-format
settings. If a text frame is linked to other text are included throughout the book.
frames, the placeholder text fills the entire
series of linked text frames.
Lorem placeholder text is valuable for
experimenting with the appearance of All four threaded text frames are filled with Roman placeholder text.
paragraph text, giving you a better idea of
what blocks of copy will look like when real
content is placed in the layout. in which the text does not use the Roman alphabet —
again, the placeholder more accurately represents what the
If you press Command/Control while choosing the Fill final copy will look like..
with Placeholder Text command, you can define a different
language to use for the placeholder text. These options are
useful if you want to experiment with a design for a layout
5. With the mesh object selected, click the Add New Stroke button at the
bottom of the Appearance panel.
Note: Advice and Warnings
Make sure you are working In addition to changing
on the Two Color layer. the existing attributes
All four threaded text frames are filled with Cyrillic placeholder text. of an object, you can Where appropriate, sidebars
also use the Appearance
panel to compound effects
and attributes. In other
The Appearance panel now words, you can add a provide shortcuts, warnings, or
shows that the mesh object has
a defined stroke, using the new stroke to any object,
default stroke color and weight. including an object that tips about the topic at hand.
already has a defined
Add New Effect stroke.
The mesh object now has a 1-pt Add New Fill
black stroke, which you will see
more clearly in a moment. Add New Stroke Note:
All four threaded text frames are filled with Japanese placeholder text. 6. With the mesh object still selected, choose Object>Expand Appearance. New appearance
attributes are created
This command converts the selected object into separate constituent objects — one on top of the currently
path for the shape’s stroke attribute and one for the object’s mesh fill — which are selected appearance. You
automatically grouped together. can drag the appearance
names in the panel to
7. In the Layers panel, expand the new group. change their stacking
464 Project 8: Festival Poster 8. Use the Layers panel to select only the mesh object in the group. sequence, which can have
a significant impact on
the end result.
Expanding the appearance
creates separate (grouped)
objects for each attribute.
Click here to select
only the mesh object.
Project Review 6. The _______________ is the imaginary line on Project Review
which the bottoms of letters rest.
1. The _______________ provide access to 7. _______________ is the spacing between After completing each project, students
handles that you can use to manually resize the
fi ll in the blank 2. Press _______________ and click the eye icon 8. The _______________ command makes the can complete these fill-in-the-blank and
artboard in the workspace.
specifi c pairs of letters (where the insertion
point is placed).
on a specifi c layer to switch only that layer
short-answer questions to test their under-
between Preview and Outline mode.
3. When _______________ are active, moving vector shapes of letters accessible to the Direct standing of the concepts in the project.
Selection tool.
your cursor over an unselected object reveals
the paths that make up that object. 9. A _______________ is a special ink used to
reproduce a specifi c color, typically used for
4. The _______________ tool is used to sample one- or two-color jobs. Project 3: Identity Package 171 Portfolio Builder Projects
colors from an object already placed in the fi le.
5. The _______________ is used to monitor and 10. Click the _______________ in the Layers panel Portfolio Builder Project
to select a specifi c sublayer.
Use what you learned in this project to complete the following freeform exercise.
change the individual attributes (fi ll, stroke,
Carefully read the art director and client comments, then create your own design to meet the needs of the project.
etc.) of the selected object. Use the space below to sketch ideas; when fi nished, write a brief explanation of your reasoning behind your fi nal design. Each step-by-step project is accompanied
e former marketing director for the Miami
e Sawdust Festival is one of the longest running
by a freeform project, allowing students to
Jazz Festival recently moved to California
and well-known art shows in California, maybe
Sawdust Festival. She was pleased with your
advertising campaign for the 2013 summer.
1. Explain the advantages of using a gradient mesh, compared to a regular gradient. art director comments to become the director of the Laguna Beach client comments even the entire United States. We’re planning our practice skills and creativity, resulting in an
work on the jazz festival project, and would
You might want to poke around our Web site to
like to hire you to create the advertising for
get some ideas. ere is plenty of information
next year’s art festival event.
about the festival’s history, and many images from
short answer To complete this project, you should: previous shows. extensive and diverse portfolio of work.
Download the Print6_PB_Project8.zip
We need an ad that will be placed in the pull-
out sections of regional newspapers, and another
archive from the Student Files Web page to
access the client-supplied text le.
version of the same ad that can go into magazines
2. Briefl y explain two primary differences between point-type objects and area-type objects.
for travel/tourism audiences (like the WestWays
Develop some compelling visual element
that will be the central focus of the ads.
color, although you should keep in mind the basic
Create an ad that ts on a tabloid-size magazine from AAA). Both ads should be four- Project Summary
color scheme that we use on our Web site.
newspaper page (9 1/2 × 11 1/2″ with As with many other skills, it takes time and practice to master image correction techniques.
no bleeds). e ads need to have all the relevant text. But just
as important, we want the ad to be art in its own Understanding the relationship between brightness and contrast, and how these two values a ect
Create a second version of the same ad to right; the visual element you create will actually be a high-quality image. An image that has too much contrast (a “sharp” image) or not enough contrast
3. Explain the potential benefi ts of using multiple artboards rather than different fi les for different pieces. t a standard magazine trim size (8 1/4 × repurposed for festival souvenirs like shirts, posters, (a “ at” image) translates to an unsatisfactory print.
the quality of reproduction in digital images, is the rst and possibly most critical factor in creating
and so on.
10 7/8″ with 1/8″ bleeds).
A basic understanding of color theory (speci cally complementary color) is the foundation
project justifi cation Use the Healing Brush Use Merge to HDR Pro to find
of accurate color correction. E ective color correction relies on the numbers, rather than what you
think you see on your monitor. As you gain experience in correcting images, you will be better able
to predict the corrections required to achieve the best possible output.
Remove photographic
grain with blur and
sharpen techniques
and Spot Healing Brush
detail in multiple exposures
tools to correct scratches
186 Use the Clone Stamp tool
to remove major damage
Correct contrast and
tonal range using the
Levels adjustment
Correct minor color problems using
the Brightness/Contrast adjustment
Correct gray balance using
the Curves adjustment
Correct lighting problems
with the Exposure adjustment
484
Visual Summary
Correct overall color cast using
the Color Balance adjustment
Correct contrast with
Using an annotated version of the Correct and convert the image using
the Curves adjustment
the defined destination CMYK profile
finished project, students can quickly
identify the skills used to complete 370 Project 6: Menu Image Correction
different aspects of the job.
v

