


Page 5 - CS6_PS_Look_Inside
P. 5
When you apply a Tilt-Shift blur, the Focus fi eld in the Options bar defi nes the blur of the area inside the Focus Lines.
More about the Blur Gallery
For an Iris blur, this fi eld defi nes the blur inside the Feather Handles.
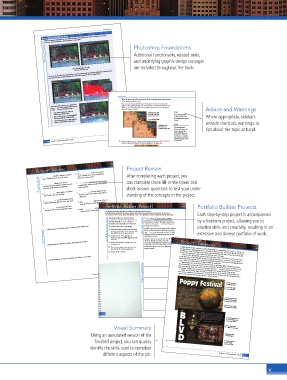
PHOTOSHOP FOUNDATIONS Photoshop Foundations
Additional functionality, related tools,
are included throughout the book.
The Focus option defines the clarity and underlying graphic design concepts
of the area in the focus zone.
You can use the Save Mask to Channels option to create an alpha channel mask from the defi ned blur. Solid areas in the
mask show areas that are unblurred; white areas of the mask show areas that are entirely blurred.
7. With the same type selected, click the Clear Override button at the bottom
of the Paragraph Styles panel.
is is an issue that you should be aware of; if you do not clear the overrides, later
In the Blur Effects panel, you can control bokeh changes to the applied style might not correctly re ect in type formatted with the style. Advice and Warnings
effects — the aesthetic qualities of blurred points
Whenever you work with styles, check the applied styles to see if a plus sign appears
of light — for any of the three blur types.
• Light Bokeh defi nes the amount of where you know it shouldn’t. When you first apply Note:
enhancement in blurred areas.
• Bokeh Color changes the bokeh highlight the style, a plus sign You could also choose Where appropriate, sidebars
appears in the name.
Clear Override in the
from neutral (0%) to colorful (100%).
• Light Range determines which brightness Clear Override button Paragraph panel Options provide shortcuts, warnings, or
menu.
values are affected by the Light Bokeh.
Note:
Clicking the Clear
Override button If the applied style
removes the plus sign. shows a plus sign in the tips about the topic at hand.
name, you can click
the Rede ne button to
change the selected style
formatting to match the
formatting of the current
230 Project 4: City Promotion Cards 8. Repeat this process to create a new paragraph style named Web Address text selection.
based on the formatting of the last paragraph in the type area.
9. Save the le and continue to the next exercise.
Project Review
Project Review 6. The _______________ tools can be used to Once you create styles, you can apply them to any text in the le, on any layer. You can
LOAD PARAGRAPH STYLES FROM ANOTHER FILE
After completing each project, you
1. _______________ identifi es and tries to protect create selections in the shape of individual also import styles from other Photoshop les so they can be used for di erent projects.
areas of detail when you scale the image.
characters or entire words.
1. On your desktop, open the le blvd_copy.txt in a text editor application.
fi ll in the blank 2. _______________ allows you to move a 7. _______________ describes the space between 2. Select all the text in the le, copy it, then close the le.
can complete these fill-in-the-blank and
individual type characters (where the insertion
selection, fi lling the original selection area with
detail instead of leaving an empty hole.
point is placed).
short-answer questions to test your under-
8. _______________ cannot be applied to type
3. A _______________ effect applies a consistent
3. In Photoshop, open the blvd.psd le if necessary. Using the Horizontal
layers; you must fi rst rasterize a type layer to
Type tool, click and drag to create a type area in the top-right corner of the
blur over the entire selected layer.
apply them.
4. _______________ is created by simply clicking 9. A(n) _______________ light source shines as a canvas.standing of the concepts in the project.
(without dragging) with one of the Type tools.
single point from a seemingly far distance.
247
Project 4: City Promotion Cards
5. _______________ is the distance from one 10. A(n) _______________ stores the visibility of Portfolio Builder Project Portfolio Builder Projects
baseline to the next in a paragraph of type.
specifi c layers at a given point.
Use what you learned in this project to complete the following freeform exercise.
Carefully read the art director and client comments, then create your own design to meet the needs of the project. Each step-by-step project is accompanied
Use the space below to sketch ideas; when fi nished, write a brief explanation of your reasoning behind your fi nal design. by a freeform project, allowing you to
e client wants to do a postcard campaign
Your local chamber of commerce saw the
postcards you created for the city of Lancaster,
to promote local tourism, but that’s as much
campaign promoting local points of interest.
content for this project — unfortunately, not an
1. Briefl y describe the result of moving a selection with the Move tool. art director comments and they would like to create a similar client comments information as we have. ey didn’t provide any practice skills and creativity, resulting in an
uncommon occurrence.
To complete this project, you should:
It will be up to you to write copy and take photos.
R esearch attractions and points of interest
short answer I nclude at least two paragraphs of copy — one or two paragraphs at most. e Web extensive and diverse portfolio of work.
ese are only postcards, so don’t use too much
in your community. Choose two areas that
you will feature in the postcard series.
address is really more important anyway, so that
should be prominent.
descriptive text and a Web address for each
You don’t have to incorporate 3D into the les, but
attraction.
the client did like your other postcards — which
2. Briefl y explain the difference between point type and area type.
F ind or take at least two photos to use in
each postcard.
in these les. I’d recommend doing versions with
and without the 3D, and we can submit both as
U se the same physical speci cations that means you should de nitely consider using 3D Project Summary
you used in the Lancaster postcards. approval proofs. Completing this project required a number of new skills for manipulating layer content — scaling and
E xport all les to JPEG. to choose the appropriate tools to a ect only what you want to change.
moving selections, applying blur e ects, and working with layer styles. By now you should understand
3. Briefl y explain the concept of a material, as it relates to a 3D object. formal page layout applications — which are speci cally designed to create and control large blocks of
the di erence between working with an entire layer and working with only a selected area, and be able
You also did a considerable amount of work with type, which can be either created from scratch or
pasted from a text editor. Although the type controls in Photoshop are not quite as robust as those in
project justifi cation that are available for selected characters or entire paragraphs. You also worked with a number of tools
type — they are certainly useful for a range of di erent applications.
You learned how to create both point and area type, as well as the di erent formatting options
that create unique artistic e ects from a Photoshop type layer — sampling colors from an image to
277
format type, applying styles to type layers, and changing layer opacity and blending modes.
Project 4: City Promotion Cards number of the options that are most relevant to print designers.
Finally, you learned the basics of working with 3D objects. As we already stated, we didn’t even
come close to explaining everything there is to know about 3D. However, you did experiment with a
Create and control
a point-type layer
Create and control
an area-type layer
Use the Content-Aware
Move tool to reposition
specific areas of a layer
Use a 3D mesh to add
the appearance of depth
278
Use paragraph styles to
move formatting from
one file to another
Visual Summary scaling to resize a layer
Use content-aware
Using an annotated version of the Apply layer styles
to various layers
finished project, you can quickly Use layer comps to
create multiple
versions of a file
identify the skills used to complete
different aspects of the job. Project 4: City Promotion Cards 279
v

