
Page 28 - Adobe Photoshop 2021
P. 28
13. Choose the Move tool, and then open the Info panel (Window>Info).
Note:
As we explained in the Interface chapter, the panels you see depend on what was
done the last time you (or someone else) used the Photoshop application. Because Use the Move tool to
workspace arrangement is such a personal preference, we tell you what panels you reposition placed guides.
need to use, but we don’t tell you where to put them. Remove individual
guides by dragging them
Remember, for this file, the live area should be a 0.25″ inset from the trim edge. In the
next few steps you will add guides to identify that live area. back onto the ruler.
If you try to reposition a
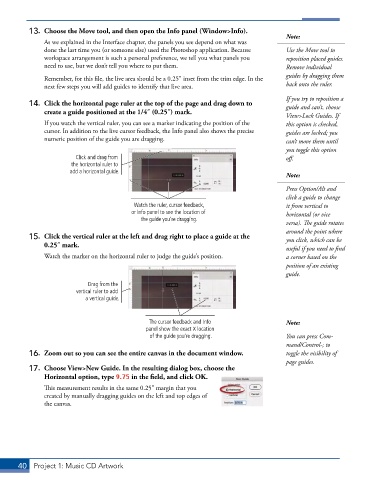
14. Click the horizontal page ruler at the top of the page and drag down to guide and can’t, choose
create a guide positioned at the 1/4″ (0.25″) mark.
View>Lock Guides. If
If you watch the vertical ruler, you can see a marker indicating the position of the this option is checked,
cursor. In addition to the live cursor feedback, the Info panel also shows the precise guides are locked; you
numeric position of the guide you are dragging. can’t move them until
you toggle this option
Click and drag from off.
the horizontal ruler to
add a horizontal guide.
Note:
Press Option/Alt and
click a guide to change
Watch the ruler, cursor feedback, it from vertical to
or Info panel to see the location of horizontal (or vice
the guide you’re dragging.
versa). The guide rotates
around the point where
15. Click the vertical ruler at the left and drag right to place a guide at the you click, which can be
0.25″ mark. useful if you need to find
Watch the marker on the horizontal ruler to judge the guide’s position. a corner based on the
position of an existing
guide.
Drag from the
vertical ruler to add
a vertical guide.
The cursor feedback and Info Note:
panel show the exact X location
of the guide you’re dragging. You can press Com-
mand/Control-; to
16. Zoom out so you can see the entire canvas in the document window. toggle the visibility of
page guides.
17. Choose View>New Guide. In the resulting dialog box, choose the
Horizontal option, type 9.75 in the field, and click OK.
This measurement results in the same 0.25″ margin that you
created by manually dragging guides on the left and top edges of
the canvas.
40 Project 1: Music CD Artwork